
Mastering Branded Product Photography: How to Get It Right (Even Without a Pro on Hand)
Branding is one of those magical skills you may not know much about, but you can tell when someone’s nailed it. Think of an AirBNB that just gets the aesthetic—booked out for months, effortlessly cool, and totally on-brand. Branded product photography works the same way.
Sure, there are plenty of brands out there that all seem to be shooting in the same studio, under identical lighting, with technically perfect images. But sometimes, that perfection feels… well, a little flat. Overdone. Forgettable. And in a world where attention spans are shorter than ever, the last thing you want is to blend in.
Your product photos need to stand out—but in the right way.
The Challenge of DIY Product Photography
When I work with retail brands or product-based businesses, photography is always top of mind. You can’t sell online without it, and even if you operate a physical store, strong visuals are the key to getting customers in the door.
During professional shoots, we meticulously compose and light every shot so the products wow. But what happens when the photographer is gone, and you need new images? What if you’re constantly getting fresh inventory and updating your catalog every week?
This is where most business owners panic: How do we keep our brand consistent when we’re doing it ourselves?
My advice? Keep it simple. And keep it consistent.
How to Capture Stunning Product Photos on Your Own
Here’s your roadmap to DIY product photography success—without losing your brand’s aesthetic.
1. Plan Your Shots
Before you grab your camera (or phone), take time to plan.
Gather Inspiration: Find images you love. Study them. What makes them work? The composition? The lighting? The mood? Use them as a guide—but don’t be afraid to adjust based on what’s practical for you. The most popular (and likely obvious) tool to achieve this is Pinterest! But you can do it almost anywhere. Hard copy with magazines, Google Docs. Whatever makes the most sense. This step is a must.
Know Your Brand Aesthetic: Are you going for bright and airy? Moody and dramatic? Natural and lifestyle-driven? Your images should match your brand personality.

Matcha Tea with a simple background
2. Choose the Right Location
Where you shoot matters. Your location should complement your brand while being practical for ongoing shoots.
For Clean, Professional Shots: A plain background (like a white or colored backdrop) keeps things simple and timeless.
For Lifestyle or Contextual Shots: Consider shooting in natural settings that reflect how your product is used—like a cozy kitchen for home goods or a stylish desk for office supplies.
Be Consistent: If you’re shooting in your store, create a designated photography space that you can replicate each time to maintain a cohesive look.
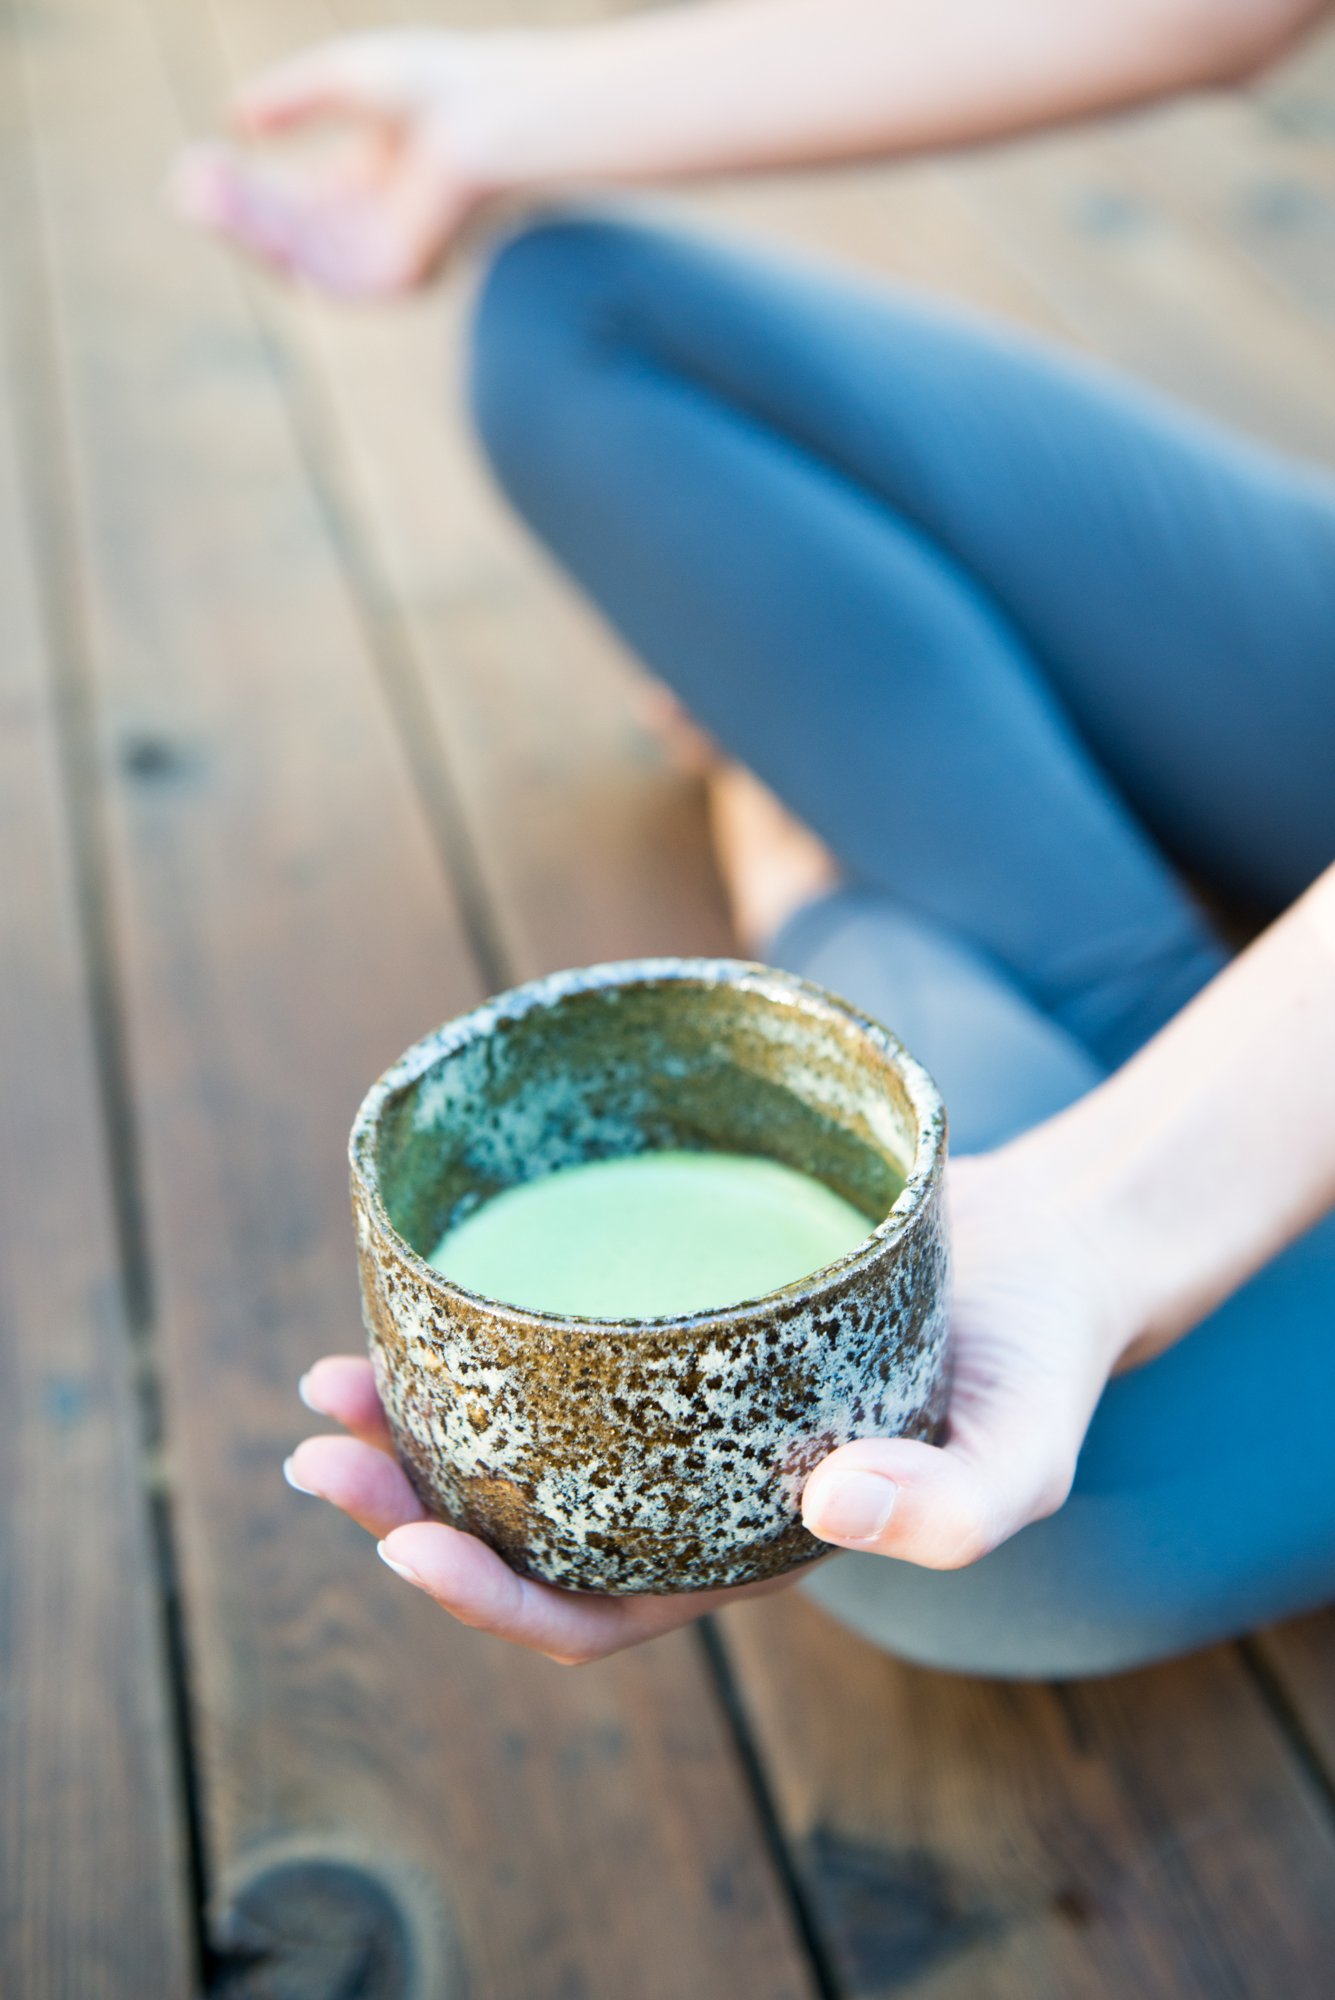
Matcha Tea in context.
3. Master Your Lighting
Lighting makes or breaks a photo. Fortunately, you don’t need a $4K camera to get it right—just a solid lighting plan.
Natural Light: Great for soft, flattering images. Shoot near a window with indirect sunlight for even lighting. Avoid harsh midday sun unless you’re going for dramatic shadows.
Artificial Light: LED panels or softbox lights help control brightness and eliminate unwanted shadows. Keep your light source consistent across shoots. (I love Paul C. Buff for softboxes! They have the best customer service and the products are very affordable!)
Filtered Light: If direct sunlight is too harsh, use a white curtain or diffuser to soften it.


4. Composition & Styling
Your product should always be the hero of the shot. Avoid cluttered backgrounds or props that compete for attention.
Keep the Focus on the Product: If the styling distracts from the item, simplify.
Use Depth to Your Advantage: A wide aperture (lower f-stop) can blur the background, making your product stand out.
Think About Size Variations: If your product catalog includes small, medium, and large items, plan consistent angles and framing so everything looks cohesive.
5. Efficient Shooting Process
Batch Your Work: Shoot similar products together to minimize set-up changes.
Have an Assistant (or a Plan): If possible, have someone help you move products efficiently while keeping your set-up intact.
Use a Tripod: Ensures consistency in framing and eliminates motion blur.


6. Editing for a Polished Look
Even if your shots are great in-camera, a little editing can elevate them.
Adobe Photoshop or Lightroom are industry standards, but easier options like Canva or Snapseed work well for beginners.
Keep Edits Consistent: Avoid over-filtering or altering colors too much—your product should look the same online as it does in real life.
7. Optimize for SEO
Your product photos should be working for you, not just looking pretty.
File Names Matter: Instead of IMG_4567.jpg, use handmade-ceramic-mug-blue.jpg to help with search rankings.
Size Your Images Properly: Large images slow down your website. Resize them without losing quality using tools like TinyPNG.
Final Thoughts
Branding isn’t just about a fancy logo or curated Instagram feed. It’s in the details—especially your photography. By planning your shots, keeping your lighting and location consistent, and sticking to a repeatable process, you can maintain a high-end look even when you’re not working with a pro.
And when you do need that professional touch? Well, you know who to call.